
Shader manager
Create, test, and manage project shaders with the Pixscape Studio Shader Manager.
On this page
Shader Manager is the Pixscape Studio UI for creating and managing custom project shaders.
This is an advanced feature intended for users who want to customize rendering effects.
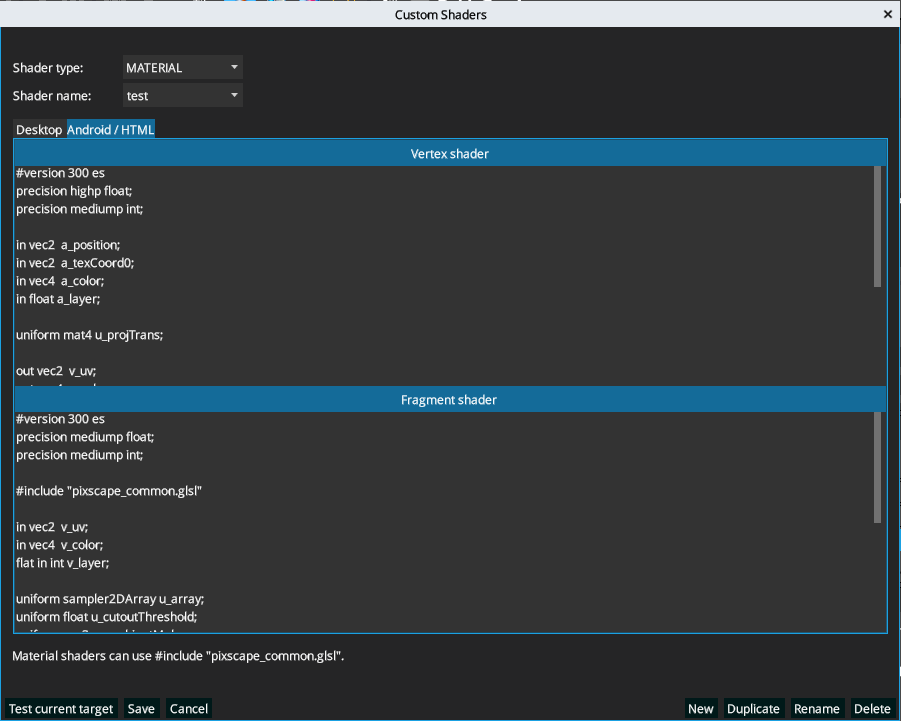
Opening the Shader Manager
Open it from Resources > Shader manager.
Use the Custom Shaders editor to create, duplicate, rename, delete, test, and save project shaders.
The editor lets you work with shader code directly inside Pixscape Studio.
Shader kind
The Shader kind selector defines the type of shader being edited.
For example, MATERIAL shaders are used for material-style rendering.
Other shader kinds may be available depending on the project and editor version.
Project shader
Use Project shader to select an existing shader from the current project.
You can also create a new shader using the New button.
Shader variants
The editor supports different shader targets.
The visible tabs include:
Desktop GL30Android ES3 / HTML WebGL2
This is important because desktop OpenGL and WebGL/mobile OpenGL ES targets can have different GLSL requirements.
When writing custom shaders, check the relevant target tab.
Vertex and fragment shader
The editor contains two code areas:
Vertex shaderFragment shader
The vertex shader controls vertex-level processing.
The fragment shader controls pixel-level processing.
Pixscape shaders may also include shared shader code, such as:
#include "pixscape_common.glsl"
Keep shared includes when they are needed by the shader.
Testing and saving
Use Test current target to test the shader for the currently selected target.
Use Save to save changes.
Use Cancel to close without applying unsaved changes.
The editor also provides:
NewDuplicateRenameDelete
Use Duplicate when experimenting from an existing shader. This is safer than editing an existing shader directly.
Practical advice
Custom shaders are powerful, but they can also break rendering if the GLSL code is invalid.
When editing shaders:
- duplicate an existing shader first
- test the current target before saving
- check both desktop and Android/HTML targets when the game is intended to be multiplatform
- keep shader code simple until the effect is working
- save only after testing
Checklist
- Choose the correct shader kind.
- Select or create a project shader.
- Edit the correct target tab.
- Update both vertex and fragment shaders when needed.
- Test the current target.
- Check Android ES3 / HTML WebGL2 when targeting mobile or web.
- Duplicate existing shaders before experimenting.
- Save only when the shader compiles and behaves correctly.