
Canvas
Navigate and edit scenes in the central Pixscape Studio canvas.
On this page
The canvas is the central editing area of Pixscape Studio.
It is where you build scenes, place assets, edit tiled maps, adjust physics shapes, define spatial volumes, and interact with the selected scene.
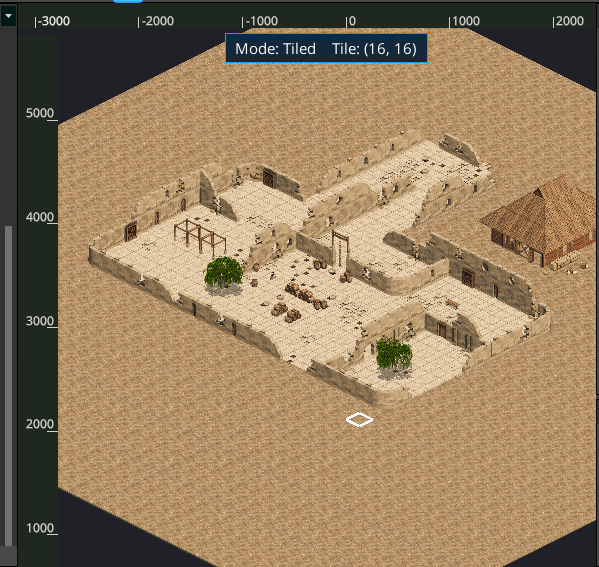
Navigation
Use the mouse to navigate inside the canvas.
- Drag with the left mouse button on an empty area to pan the view.
- Use the mouse wheel to zoom in and out.
- The zoom is centered around the canvas view, making it easy to move quickly between a global view and detailed editing.
Ruler
The ruler displays world coordinates around the canvas.
It is useful when placing objects precisely, checking scene scale, debugging positions, or working with large tiled maps.
The ruler can be enabled or disabled from the bottom bar.
When the ruler is enabled, coordinate markers are displayed along the canvas edges.
Dropping assets into the scene
Assets can be dragged from the Project Assets panel and dropped directly onto the canvas.
Select the target Universal Layer before dropping regular scene assets such as images, animations, particles, lights, or Game Object assets.
Examples:
- Drop an image or sprite asset to create a visual entity.
- Drop a Game Object asset to instantiate its reusable hierarchy in the scene.
- Select the target Tiled Map before painting or placing a tile or Tiled animation.
The canvas behavior depends on the current selection and the active editing mode.
Context menu
Many canvas actions are available from the right-click context menu.
The available actions depend on what is selected and which editing mode is active.
For example, the context menu may provide actions for:
- copying, cutting, or pasting entities
Convert Selection to Game Object…andSave as Game Object Asset…- deleting selected elements
- adding or editing physics shapes and joints
- running other mode-specific commands
If an action is not visible, check that the correct Universal Layer, item, Tiled Map, or editing context is active.
Selection
The canvas supports direct object selection.
Click an object in the scene to select it. The selected object displays an outline and editing handles when applicable.
The same selection is reflected in the Items tree and its editable values appear in Properties; see Items & Properties.
Lasso selection
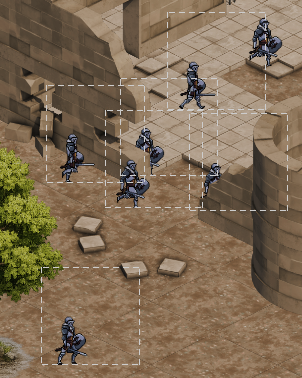
You can select several objects at once with the lasso selection.
Drag on the canvas to draw a selection rectangle around the objects you want to select. Objects inside the selection area become selected together.
This is useful when moving or editing a group of scene entities.
Selected entities are shown with dashed outlines, making it easier to see which objects are currently part of the selection.
Multiple selection with CTRL
Hold CTRL while selecting objects to build a multiple selection manually.
This lets you add objects to the current selection without losing the objects that are already selected.
Use this when the objects are not close enough for a lasso selection, or when you want to select only specific entities in a dense scene.
Transform gizmo
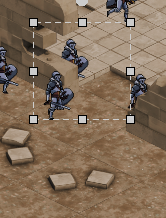
When an object is selected, Pixscape Studio displays a transform gizmo when the current editing context supports it.
The gizmo can be used to adjust the selected object directly in the canvas.
Depending on the selected object and active editing mode, the gizmo may expose handles for moving, resizing, or adjusting the object.
Resizing with CTRL
To resize an object with the gizmo, hold CTRL and use the resize handles.
This prevents accidental resizing during normal selection and movement operations.
Use the square handles around the selected object to adjust its size.
The exact available handles depend on the selected object type and the active editing mode.
Direct quad editing
Select an eligible sprite once to use its normal transform handles. Click the already selected sprite again, without dragging, to toggle direct quad editing. This is not a double-click gesture: dragging the selected sprite continues to move it normally instead of entering quad editing.
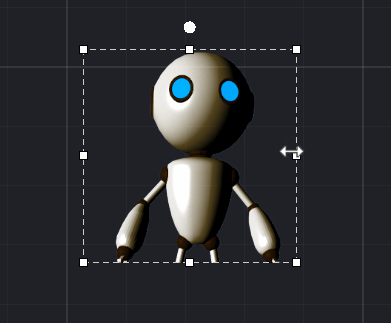
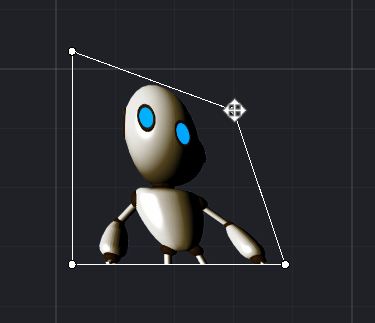
In quad editing, drag a round vertex handle to move that corner independently and deform the sprite. Click the selected sprite again, press Escape, or change the current selection to return to normal editing.
Quad editing applies to a single eligible ordinary or animated sprite selection. A repeatable sprite is not eligible while Repeat X or Repeat Y is active.
Quad deformation is saved with the scene and is preserved when the entity is used inside Game Objects or exported to Runtime. Vertex edits also participate in the normal undo/redo history.
Repeatable sprites
Repeat lets a normal sprite cover a larger area by tiling its image instead of stretching the source texture across the full size.
Select the sprite, then use the Repeatable section in Properties. Repeat X repeats the image horizontally, Repeat Y repeats it vertically, and both can be enabled together.
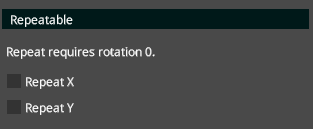
Repeat is intended for axis-aligned sprites and requires rotation 0°. Regular animated entities do not use repeated sprite rendering.
Editing modes
Pixscape Studio adapts the editor depending on the active mode.
The main workflows include:
Normal editing
Used for regular scene entities such as sprites, animations, Game Objects, lights, particles, and other normal entities.
In this mode, the canvas is mainly used to place, select, move, and edit scene entities.
Tiled editing
Used when working with a Tiled Map, which is a scene entity inside a Universal Layer.
In this mode, the canvas behaves like a tile editor for the selected Tiled Map. You can paint, select, and edit its cells with the active tile tools.
Imported maps remain editable in this mode; see Import Tiled maps and tilesets.
Physics editing
Used when editing physics data.
In this mode, the editor exposes physics-related handles and actions, such as body shapes, fixtures, and collision-related authoring tools.
Spatial editing
Used for 2.5D Spatial Depth authoring.
In this mode, drag across occupied cells to create rectangular Spatial walls, then adjust their footprints and connected structures. This is part of the selected Tiled Map’s Spatial Depth workflow. See Spatial V3 for 2.5D depth for the complete workflow.
Adaptive editor behavior
The canvas does not always show the same tools.
Pixscape Studio changes the available handles, selections, context menu actions, and editing behavior depending on:
- the active Universal Layer
- the selected Tiled Map editing target
- the selected item in the Items tree
- the selected asset
- the current editing mode
- the object under the cursor
This keeps the UI lighter and avoids showing tools that are not relevant to the current workflow.
Checklist
- Use left mouse drag on empty canvas space to pan.
- Use the mouse wheel to zoom.
- Enable or disable the ruler from the bottom bar.
- Drag assets from
Project Assetsand drop them onto the canvas. - Use the right-click context menu for mode-specific actions.
- Click an object to select it.
- Use lasso selection to select several objects at once.
- Hold
CTRLto build a multiple selection manually. - Use the transform gizmo to edit the selected object.
- Hold
CTRLwhile using the gizmo handles to resize. - Click an already selected eligible sprite again to enter direct quad editing, then drag the round vertex handles to deform its corners.
- Use
Repeat XandRepeat Yto tile a normal sprite across its size. - Keep repeatable sprites at rotation
0°. - Select the target Universal Layer for regular scene content.
- Select the target Tiled Map for tile editing.
- Use Items selection to enter Tiled, Physics, or Spatial contexts where appropriate.
- Remember that the canvas adapts to the active editing mode.