
Import assets and tilesets
Import images, sprite sheets, particle effects, PNG tilesets and standalone TSX tilesets.
On this page
Open the asset importer with File > Import > Assets... or the Import button in the Project Assets panel.
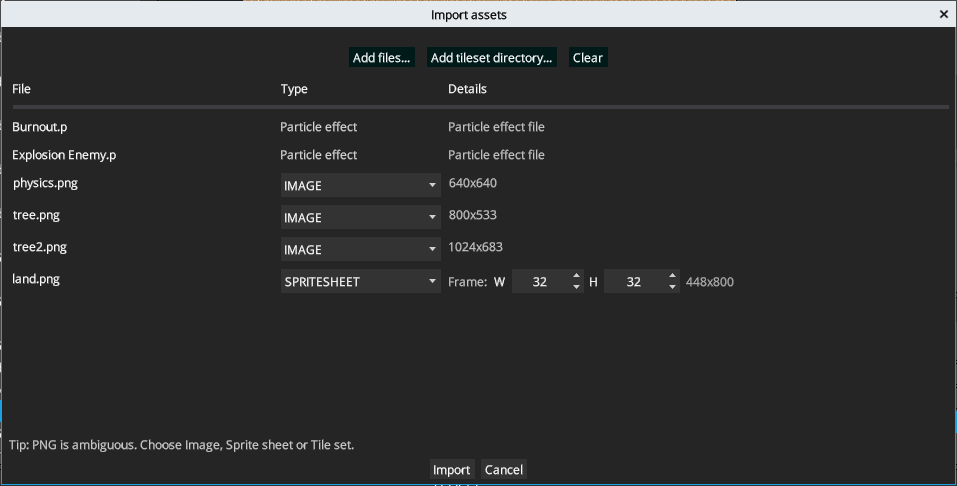
The screenshot shows the base import list. Tileset rows expose additional profile controls.
Add individual files
Click Add files..., inspect the detected type for every row, then use the X button to remove an unwanted file or Clear to empty the list.
A PNG can be imported as an IMAGE, a SPRITESHEET or a tileset. For a sprite sheet, choose SPRITESHEET and set Frame W and Frame H to the dimensions of one frame.
Particle effects normally use a .p file. Also import the PNG texture referenced by the effect when it is not already in the project.
Import a standalone TSX tileset
Use Add files... and choose the .tsx file. Studio detects it as a TSX tile set and reads:
- single-image and image-collection tilesets;
- tile width and height;
- margin and spacing where applicable;
- supported tile animations and their frame durations;
- referenced images and their relative paths.
Standalone TSX import creates Pixscape tile assets and, when declared, tile-animation definitions. Single-image tilesets use the atlas dimensions, margin and spacing from the TSX; image collections import each supported tile image.
Referenced images are resolved relative to the TSX file. See Import Tiled maps and tilesets for TMX support and current Tiled limitations.
Import a PNG atlas as a tileset
Add the PNG, select the tileset type, then open Profile.... The Tileset profile dialog defines both slicing and placement:
Tile widthandTile height: size of a tile inside the atlas;MarginandSpacing: border and gap used when slicing the atlas;Cell widthandCell height: logical placement cell in the scene;Projection:OrthogonalorIsometric;Anchor:Top center,Bottom center,Bottom left,CenterorTop left;Offset XandOffset Y: adjustment from the selected anchor;Render size: the source image’sNativedimensions.
The default manual profile uses 32 × 32 tiles and cells, orthogonal projection, Top center, zero offsets and native render size. Change these values to match the source art before importing.
Import a folder tileset
Choose Add tileset directory... to import a directory of individual tile images. Review its profile before import. Folder profiles provide cell size, projection, anchor and offsets; each tile keeps its native image size.
Profiles apply to the tileset as a whole. Studio does not provide per-tile profile overrides. For tall isometric walls and props, use the logical cell size plus anchor and offset to align their footprint while preserving the full native image.
Complete and verify the import
Click Import after checking the file list, types and profiles. Imported assets appear under the appropriate sections of Project Assets.
Before building a large scene:
- place representative tiles at the edges and center of a small test Tiled Map;
- check atlas spacing and margin for bleeding or shifted regions;
- preview tall tiles to verify their anchor and offset;
- verify imported tile animations;
- only then author Spatial V3 walls on the Tiled Map.
For a first project and export workflow, continue with Try Pixscape in 10 minutes.